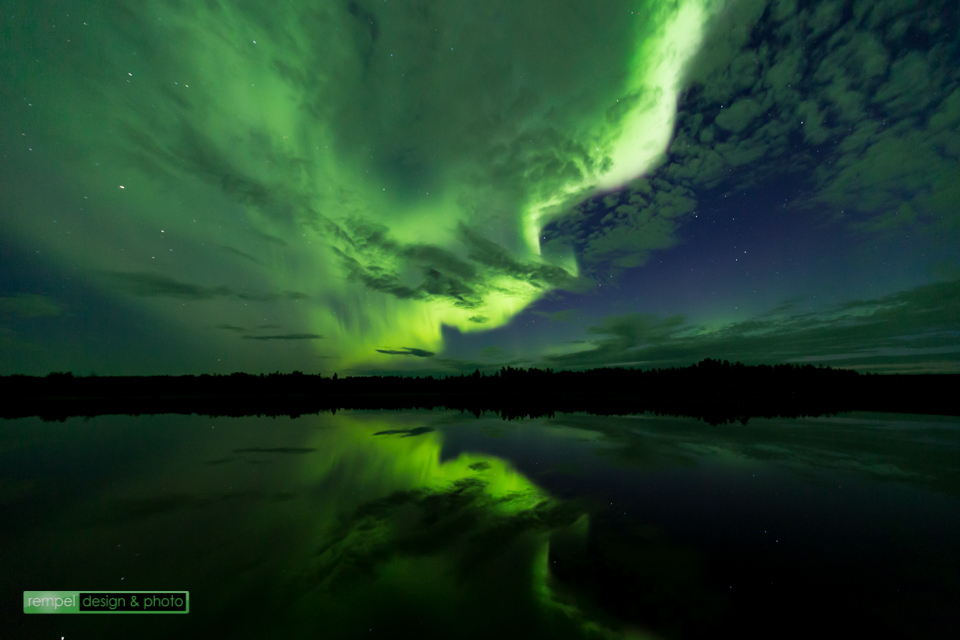
612.616.3296brad@rempeldesign.com
Northern Lights

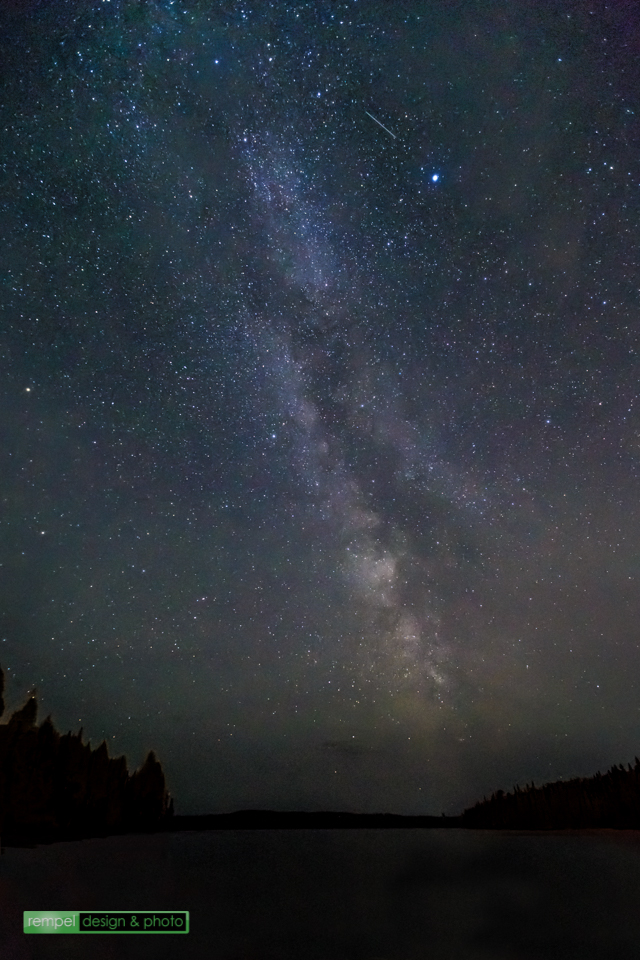
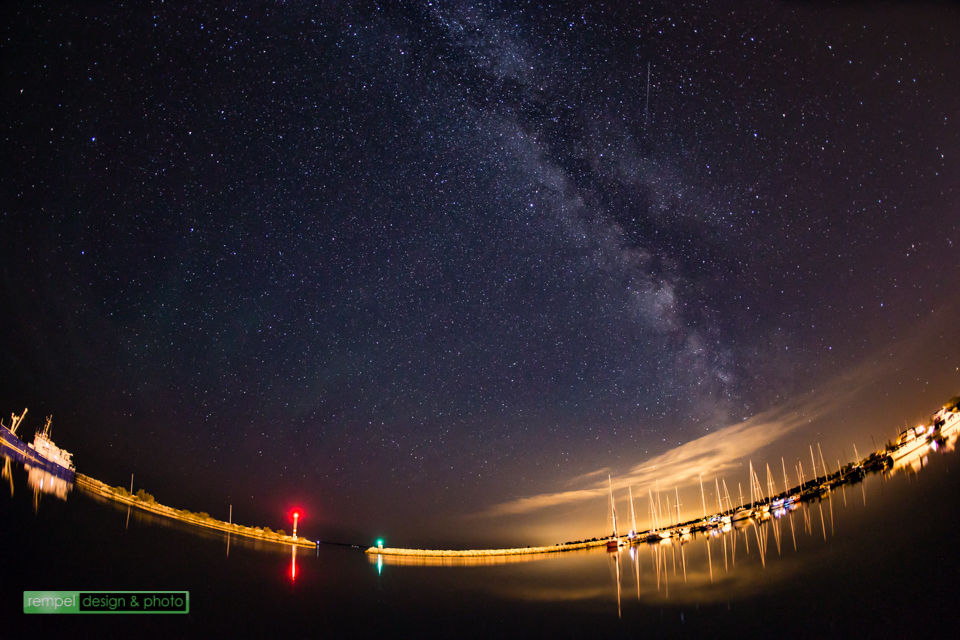
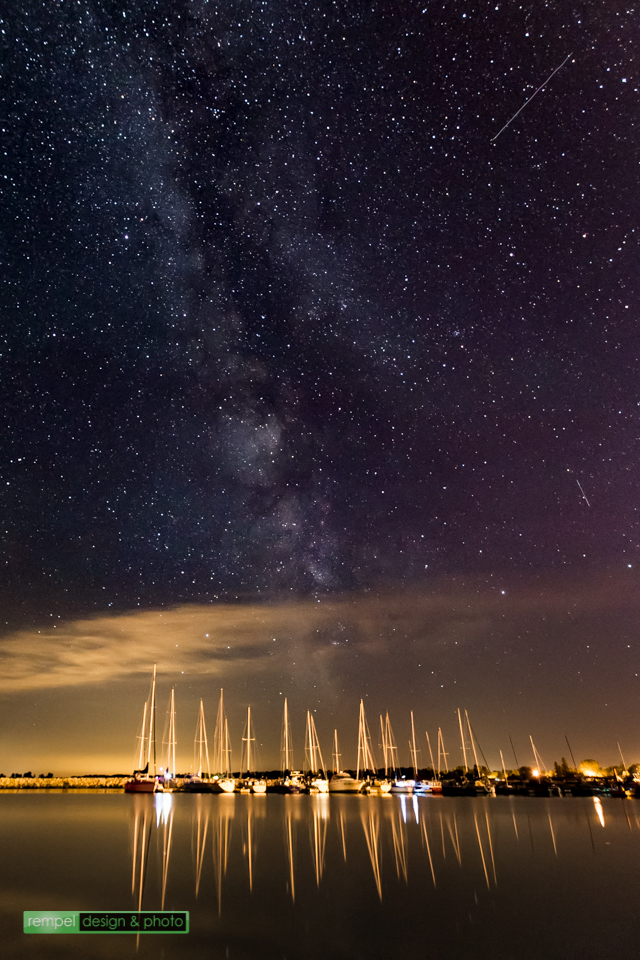
I made a recent trip up to Northern Manitoba and I really wanted to try and capture some images of both the Milky Way and of the Northern Lights. I’ve always loved the images I’ve seen on social media sites but I didn’t know how to photograph either of them. I joined a couple of groups on facebook, asked a few questions, and read a few articles online in hopes that I could quickly educate myself and get some great photos. Overall I’m happy with what I’ve learned and what I’ve photographed, so I thought I’d share my experience with others and maybe save them some time as well.

Just before I drove up to Thompson, Manitoba, I friended someone who lived there who was active in shooting the aurora (Doug Burkman). He was extremely helpful and after a ton of facebook messages back and forth I thought I had a good idea of what to do. I used a combination of 3 sites to help determine if the northern lights are going to appear and when.

  1. Aurora Forecast. Its a general site that gives you a 3 day outlook on expected Aurora levels. Its very basic but a good indicator.
  2. Space Weather Prediction Center. I loved using this site to look at the 30 minute and 3 day forecast. The 30 minute wasn’t completely useful because I needed to know a little further in advance. It looks like your basic weather radar but it show the Aurora.
  3. Aurora Service. This site was very useful in providing a 3 day Kp outlook in Universal Time (UTC). You have to convert the UTC into your timezone which added a little confusion but after awhile it makes sense. CST is -5 hours from UTC. The chart gives a 3 hour (military) time block like 00-03, meaning 12-3am on a Tuesday, but when you -5 hours, it’s 7-10pm Monday night. Now what is a Kp level? There’s a map showing what Kp level you need to make viewing the Northern Lights “possible”. Northern Manitoba needs a 3 whereas Minneapolis needs a 5+ or 6.

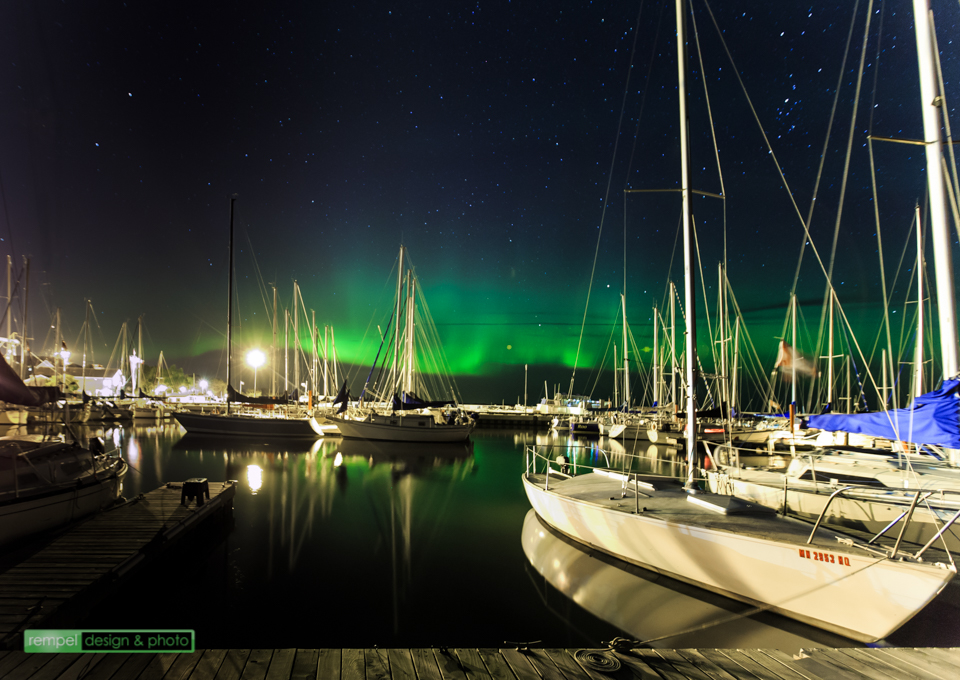
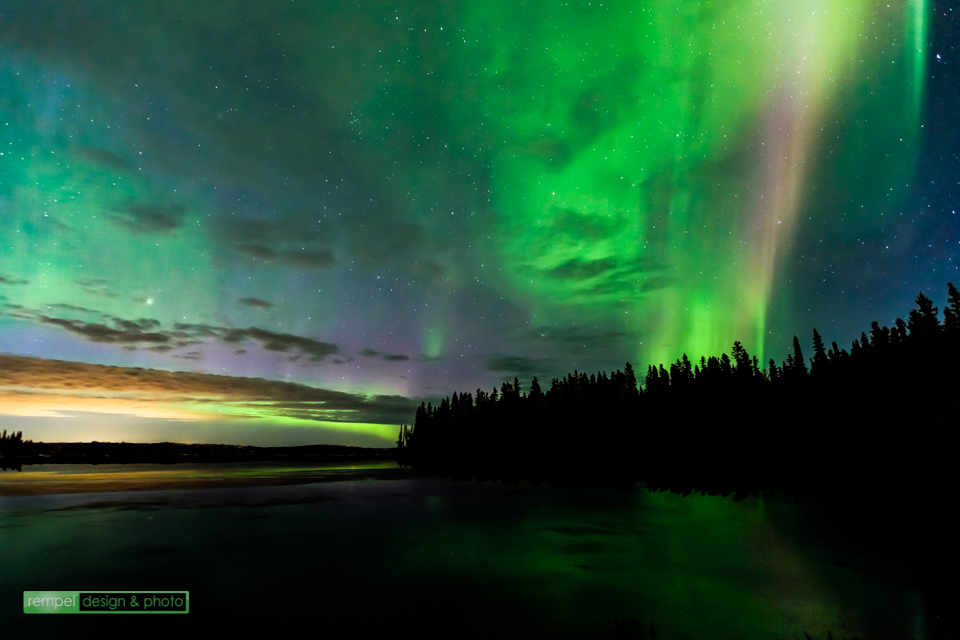
So between those 3 sites you have a pretty good idea if the northern lights were going to happen, but sort of like the cable company, it gives you a 3 hour window and you have to wait. The biggest factor in all of this, after you’re sure a Aurora will happen, is the weather! I figured out on my drive up to Thompson that there would be a good chance of Northern lights that night between 10pm – 1am. During the entire drive it was cloudy, raining, and overcast, meaning I wouldn’t see anything but you sit there and hope…”well its got 4-5 hours for it to clear up…maybe it’ll work”. Luckily, the skies kind of cleared for a couple hours, it gave me my window between 10-1, and I was able to capture some images. The next night was almost identical and I felt very lucky.

Camera Settings:
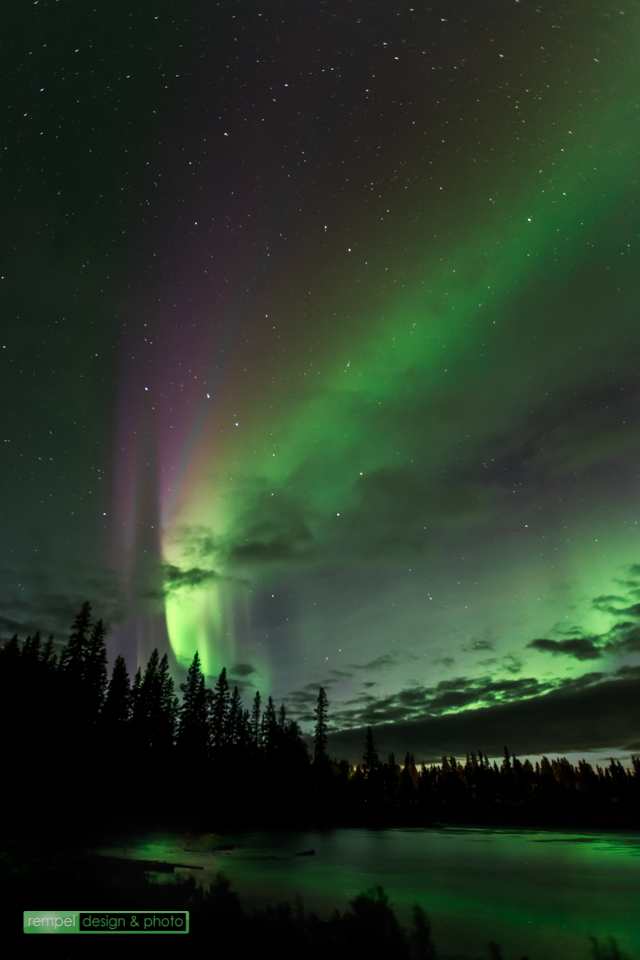
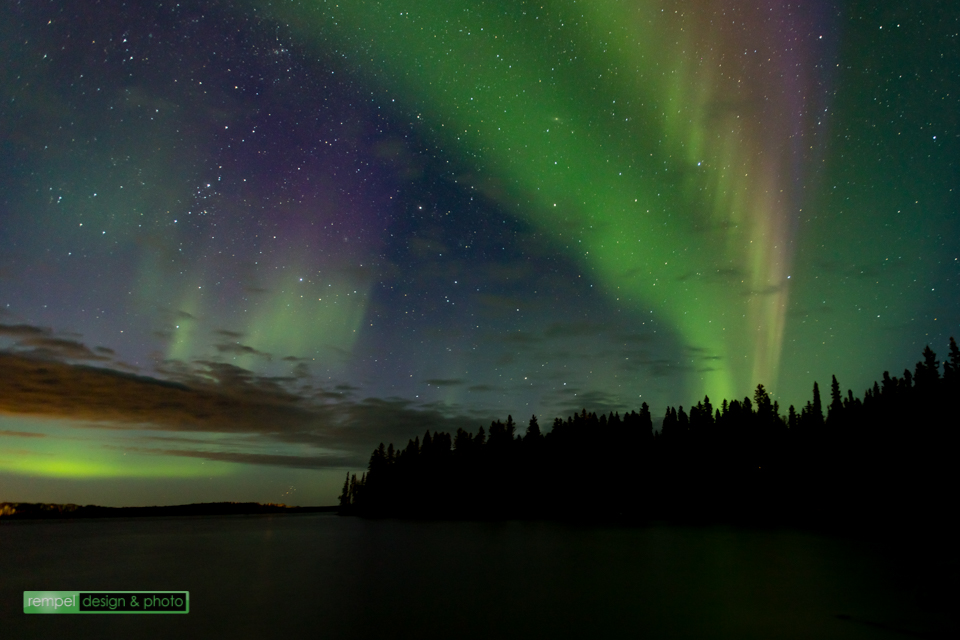
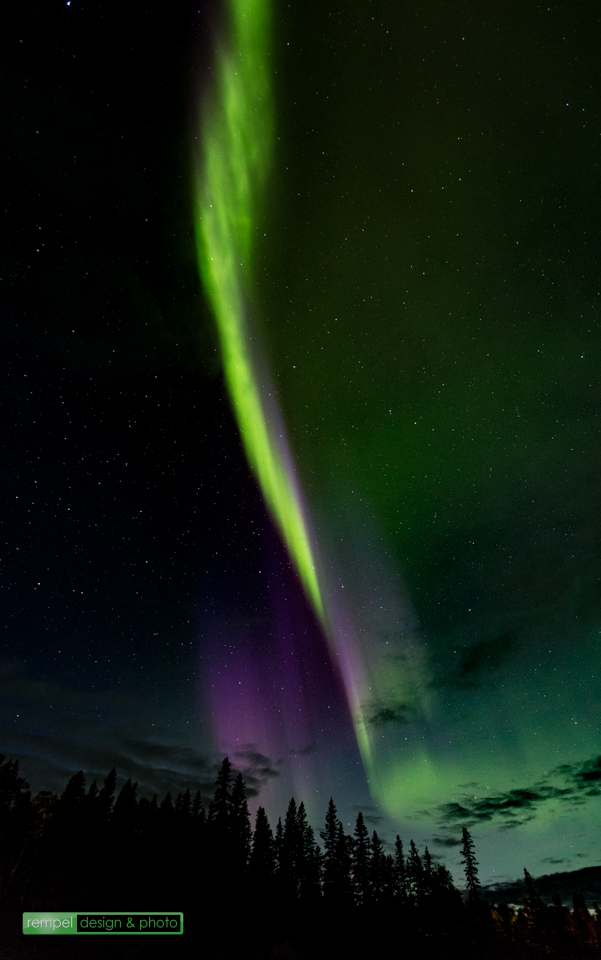
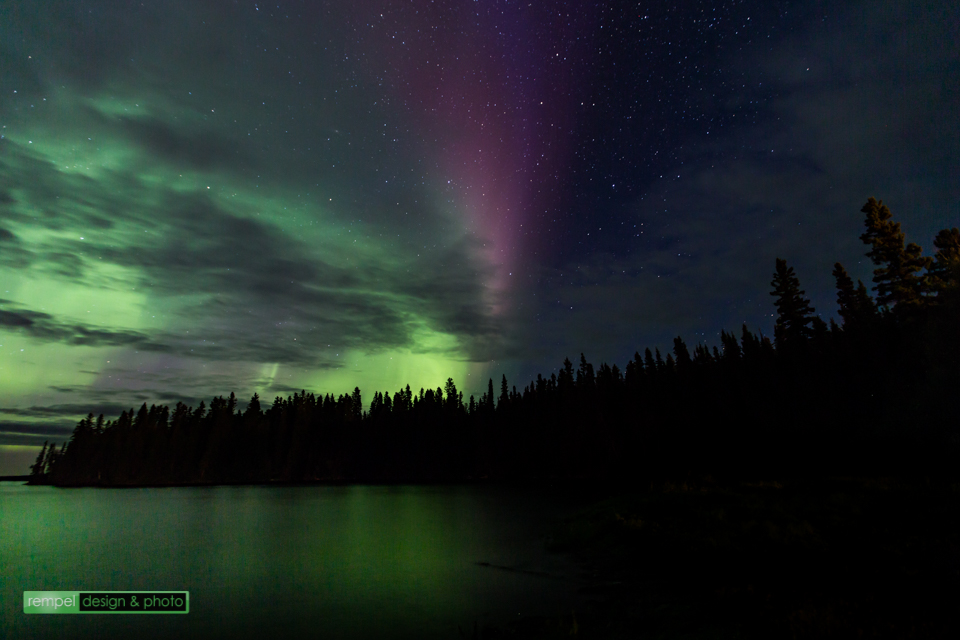
In most cases I saw new photographers asking what settings should there camera be at? I learned that I was really all over the place and there isn’t one magic setting that applies to everything. I included my camera settings on the photos so you can see what I used but here are some things that you will need to know.

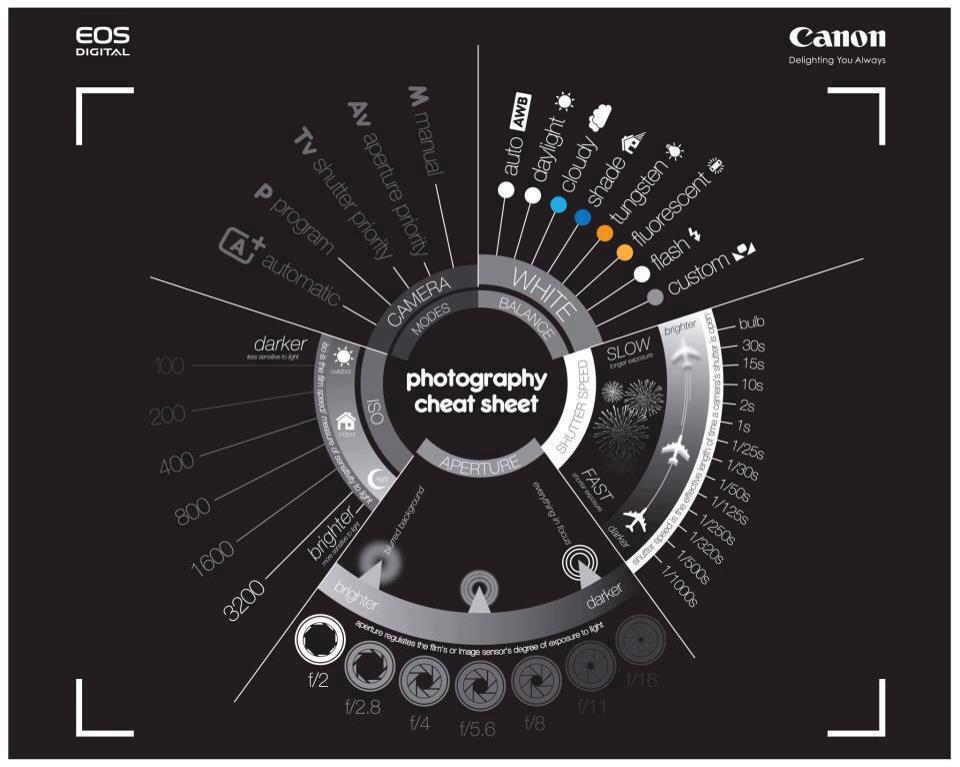
  1. Shoot in Manual mode. I always do anyway so it wasn’t a change for me anyway. You’ll need to adjust your ISO and shutter speed but I left my aperture at f/2.8.
  2. I focused on a far away object like a tree, star or light. Then looked at my lens window to see if the focus ring was at “infinity”. I then turned my focus from auto to manual so my camera wouldn’t struggle to focus on the lights when I was trying to take a picture. Ideally you could tape down your focus ring but I forgot tape.
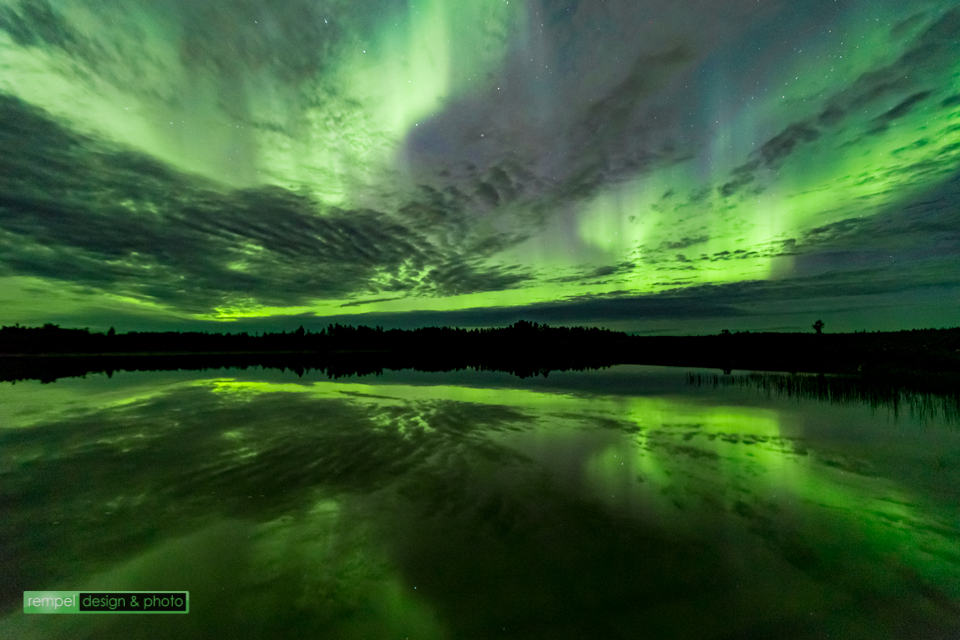
  3. I used “live view” mode with “simulated exposure”.  My biggest surprise with this entire experience was how much color your camera picks up that your eyes don’t see. So to help me, I would point my camera at the lights. They appear much brighter on the LCD screen and in camera then you’ll ever see with the naked eye. So if I was ever in doubt, I’d unmount my camera from the tripod and just point it at the sky to see what was happening.
  4. Turn your LCD brightness down a couple notches. I found the histogram a little tough to guide you so I relied on what the images looked like on the LCD. I usually had to increase exposure on all of them in post processing.
  5. White Balance. I shot everything in RAW mode and auto white balanced. I really don’t mind changing it in post production in Lightroom and it gives me more control to edit.

Other things you want or need:

  1. Tripod. You have to have it, get a good one.
  2. Remote Shutter release. Its much handier to trigger your shutter with this vs touching your camera our using a 2 second delay.
  3. Chair. Ugh..I didn’t bring one and you could be there for a few hours and it beats sitting on the ground.
  4. Headlamp or flashlight. You can’t have it on when you’re shooting but its handy looking for things or at your camera at 1am.
  5. Bug Spray or the right clothing. It got a little chilly so dress appropriately and it was northern Manitoba..crazy mosquitos.
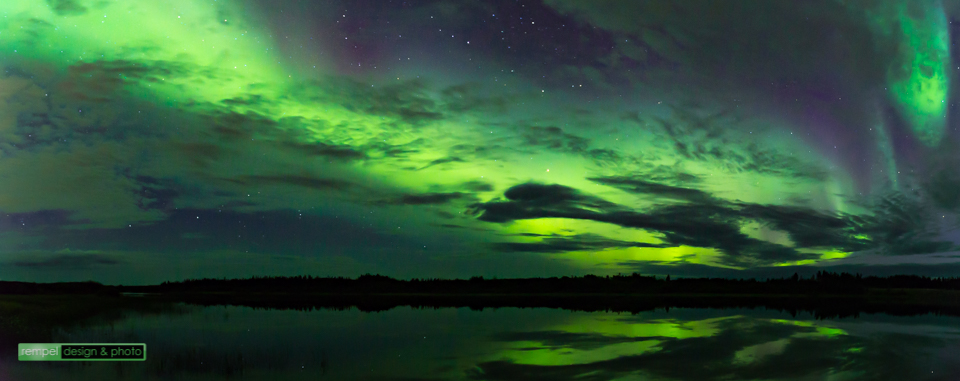
  6. Be prepared to move. To my surprise, the lights appeared in different areas of the sky most of the night. I thought I just point the camera in one direction and I was good to go. They’re up, left, right, panoramics…..I was unprepared the first night shooting and I didn’t sit much.

Hopefully this helps and feel free to ask me anything: brad@rempeldesign.com
Follow me on Instagram and Twitter: @brad_rempel

Read More
Work Flow

Over the years I’ve learned that every photographer has their own workflow. Some are different..some the same and it’s based on your own personal preference. I’ve tried a couple different methods but here’s what I found works best for me. Is it right? No. Is it wrong? Nope. It’s just what I prefer. Here’s a step by step process of how I incorporate Lightroom and PhotoMechanic when photographing a sporting event.

Pre-game:
  1. fig. 1

    fig. 1

    I’ll make a folder on my desktop for the game I’m photographing. In this case I’ll use the last game I worked (Pittsburgh Penguins vs the Minnesota Wild) and I’ll call it “vs Pittsburgh 11-4” (fig. 1). Why? It’s just the way I have my Lightroom catalog set up (I break my folders down by sport, then year, then by opponent).

    • Minnesota Wild
      • 2014-2015
        • vs Pittsburgh 11-4
  2. Next, I’ll download my .xmp file provided by the agency I’m shooting for and save it into that folder. Then I’ll make the necessary changes to the Stationary Pad in PhotoMechanic which is usually just making a generic caption that I will apply to all the images. Speed will be important when it comes to captioning and uploading the files during and after a game.

I make my team code replacement files for PhotoMechanic. You can use the http://www.codereplacements.com/ website and pay for the service but I’m cheap and I don’t find it hard to do it yourself. This is probably a separate blog post but it’s a combination of the team data from ESPN, then using Excel and Word to create the text files. Unless it’s the first game of the season, the home team is already done so it’s really just making one for the visiting team and it takes me about 5-10 minutes. I’ll then load the code replacement files into PhotoMechanic. It usually consists of 3 different text files:

  • Home Team
  • Visiting team
  • Hockey terms (I’ll use short code for terms like celebrates, shoots, passes, skates with the puck, congratulates (cel, sh, pa, swp, etc..). It just saves me time when I caption and it’s something that I’ll use every game.

That’s it for pre-game. Let’s go eat!

During the game

For hockey, you shoot the entire period, then run back to the photo editing room during intermission and work as fast as you can. This is 18 minutes which sounds like a lot, but it flies by and there’s a lot to do.

  1.  fig. 2I import all my photos through Lightroom with a USB 3.0 card reader for the fastest transfer speed. Why Lightroom vs PhotoMechanic first? I like to apply a global develop setting to the entire card when I import it. I know my lighting is consistent so I can apply the same develop settings to every picture. In this case it’s at Xcel Energy Center and I already have a preset made (MN Wild 1250/1250/2.8). Within that preset I have a number of corrections I apply so I’d rather apply them all at once in the beginning vs individually later. Here’s why:
    • I know what camera settings I’ll be shooting at in manual mode. 1250 shutter, 1250 ISO, at f/2.8
    • I shoot in large RAW format so it’ll adjust my white balance on import. I find this the biggest advantage in photographing in RAW. I’ll adjust WB to whatever temperature I need instead of using a warmer/colder on a .jpeg.
    • *Side Note*: Some people shoot RAW + jpeg and make their edits on the jpeg thinking importing the RAW files will take too long and they’re too big. I’ve never had an issue in regards to speed. Maybe it’s my computer, card reader..who knows but I don’t have an issue with it.
    • *2nd Side Note*: The first time I switched over to RAW I was scared that it was going to be different when I processed photos. When I open a RAW file or a jpeg in Lightroom they’ll function exactly the same. There’s no compression in the RAW file and you can have more editing capabilities, so there’s no reason not to. Go ahead, make the switch, you’ll be glad you did.
  2. As its importing I go through the entire period of images. This is the biggest drawback to using Lightroom vs PhotoMechanic. PhotoMechanic is a zillion times faster at rendering the image and it’s much faster to go through and select the images you want. Lightroom takes its time rendering and you’ll get the spinning “loading” symbol at the bottom. If I ever change my workflow, this will be the reason. I’ll go through all the images and flag them using the “p” key (pick). If I screw up, I’ll unflag them with “u” key. An entire period is usually between 150-250 images. Between whistles I’ll delete images that I know I’ll never use, or they’re blurry, or they’re just plan shitty so I limit how many I import between periods.
  3. Once I’ve flagged all the images I like (including stock for later), I’ll turn on the library filter so it shows me just the flagged images or my keepers. From the “grid view” I’ll select a few game relevant images that I need to transmit, usually between 4-8 and give them a color. 1st period = red, 2nd period = yellow, 3rd and final images = green. Why these colors? It’s just the order in Lightroom so it helps me keep track of what I’ve sent and I don’t resend the same image after the game.
  4. I’ll then sort the flagged images by “label color” so the “red” images show up first and enter the “develop” mode.
  5. Within develop mode all I really need to do is crop since all the images had the “MN Wild preset” applied to them. On occasion you’ll have some minor tweaking if it’s in a dark spot in the arena.
  6. Once the cropping is done, I’ll export the files to the desktop in a separate folder and call it “USA1” so I know it’s my first set of transmitted images (next period is USA2). On export you’ll set up:
    • Folder location
    • Renaming (if you need to)
    • File size limitations
    • Resolution
  7. fig. 4

    fig. 3

    Then I go into PhotoMechanic and hit refresh and my newly editing folder USA1 will appear. Open it, select all, and then apply stationary pad to all the images. Now every image has the generic caption for all the images and I just need to fill in the “XXXXXX” for each image using the code replacement files (home, away, and hockey terms) that are already loaded. (fig. 3)

  8. In figure 4, you’ll see how PhotoMechanics code replacement works:

    fig. 4

    fig. 4

  9. Then I click “Save, Upload, Advance” and caption the next image until I’ve done all the selected images for that period (fig. 4). The FTP servers are already set up to go to the appropriate agencies. *knock on wood* – I’ve only screwed up once sending a couple files to the wrong agency. Whoops, forgot who I was shooting for that night.

Now hopefully this was all done in 18 minutes so I can run out to the next location for the next period. On occasion you don’t quite get it done in 18 and you’ll miss the start of the next period. Oh well, all you can do is try.

Post-Game

The only thing slightly different in the post-game transmission is I’ll look through all 3 periods flagged photos and find other pictures that may have been game relevant that occurred during the 1st and 2nd periods. Things like stock photos of goal scorers or other photos that were good but didn’t have the time to send. Since I’ve “colored” the photos by period, I know which ones I’ve sent already.

My PhotoMechanic by default is set to organize the pictures by capture time. This will also help when figuring out what period the action happened.
I’ve also got more time so I can relax a little. In the end I’m hoping to send about 30-35 end of game images and the others that I flagged will go to the stock folders another day.

VERY IMPORTANT: If you export your folders into separate sub-folders (like described), after you’re done shooting you’ll have to copy all the saved images with captions back into Lightroom.
So from Photomechanic:

  • Select all
  • Save photos as (select the main folder: vs Pittsburgh 11-4

Then in Lightroom right click on the folder and “synchronize the folder”. It’ll then import all the new jpegs you just captioned and transmitted and all the metadata in the caption field. So now if I need to find any Charlie Coyle pictures, my library is up to date. *Side note* – If your images look all out of whack, it’s because you’ve applied the “MNWild” import settings again on the already corrected jpegs. Just select all, right click, develop settings, and “reset”.

It sounds like a lot and it is. You’ll eventually get into your own rhythm and it’ll seem like a snap in no time.

Read More
Camera Cheat Sheet

Recently I’ve been getting the same questions from people who have recently upgraded their cameras to new DSLR’s and want to know more about them. Specifically, they’re photographing sports and it’s not turning out as awesome as they’d hoped when they made the jump from a point and shoot, to a “real” camera. I really don’t mind answering the questions because I really do want to help, but it always comes down to understanding what the basic functions of shutter speed, aperture, and ISO. I usually explain to people its a balancing act between those 3 settings and finding the right sweet spot for whatever sport you’re photographing and what your camera/lens can handle.

So I found this cheat sheet online and I wish I could give credit to whoever made it (it’s got the Canon logo so I’ll assume it’s theirs) but I think it does an awesome job and explaining what changing your camera settings will do to your image.  So in the words of Fast Times at Ridgemont High‘s Brad Hamilton, “learn it, live it, love it”.

After you memorized this and your pics still aren’t quite where you want them, you’re going to want to upgrade cameras and lenses….trust me, all the big stuff isn’t for show, you’ll need it. Enjoy!

What your camera settings really do

Read More
High Up

Here’s a behind the scenes look at the catwalk of the Xcel Energy Center and setting up a camera to take overhead photos of the Nashville Predators and the Minnesota Wild. While I’m not exactly “scared” of heights but I’m not super comfortable with it either. The entire time you’re walking, you have a death grip on your equipment so nothing can fall below into the stands or the ice. The general public isn’t in the arena yet because you set up the camera before they are allowed in, but being safe is critical. It’ll take one person to drop something onto the ice and arenas will ban it…..so be careful.

I’ve also included a number of “keepers” I took from the game. Typically you hope for a 2-3 that are pretty good….and sometimes you stretch it to 5-6 because of the effort it takes to set this up. Surprisingly, I think I had quite a few good ones. Unfortunately Nashville and Minnesota both had their #2 (or #3) goalies in (Carter Hutton and Darcy Kuemper). I was hoping for Rinne and Backstrom..oh well.

Enjoy the video and the images!

MN Wild catwalk from Brad Rempel on Vimeo.

Read More
Remote Cameras

A quick step by step process for beginners on how to set up wireless remote camera. This process will tell you what equipment is needed, how to set it up, and how it works. It’ll be easier then you thought and it allows you to photograph from 2 places at once (or more)!

A quick step by step process for beginners on how to set up wireless remote camera. This process will tell you what equipment is needed, how to set it up, and how it works. It’ll be easier then you thought and it allows you to photograph from 2 places at once (or more)!

Read More